
OpenCv.js custom build
OpenCv is a powerful computer vision library, giving you access to lots of basic and advanced image processing operations.
OpenCv is a powerful computer vision library, giving you access to lots of basic and advanced image processing operations. Check out the documentation with an interactive playground and lots of examples. There is also a Javascript and WebAssembly build available, which means you can use OpenCv in a web application. Unfortunately, the default build is quite large at about 7.6Mb.

How to create an OpenCv.js custom build
OpenCv is a powerful computer vision library, giving you access to lots of basic and advanced image processing operations. Check out the documentation with an interactive playground and lots of examples.
There is also a Javascript and WebAssembly build available, which means you can use OpenCv in a web application. Unfortunately, the default build is quite large at about 7.6Mb.
You can get the latest precompiled Version from the official OpenCv Site, but in this post we will create a custom optimised WebAssembly build of OpenCv from scratch.
In this example, we are using Ubuntu, but there are scripts available for Windows as well.
The full build instructions are available at opencv.org
Prerequisites
Make sure git, cmake and python (>= 2.7) are installed:
$ sudo apt install git
$ sudo apt install cmake
$ sudo apt install python
Set up Emscripten
First, create a new directory and install Emscripten:
$ mkdir customopencv

$ cd customopencv/

$ git clone https://github.com/emscripten-core/emsdk.git

$ cd emsdk/
$ ./emsdk install latest
$ ./emsdk activate latest
$ source ./emsdk_env.sh
Test Emscripten
Make sure Emscripten is installed correctly, create a new directory hello and create then compile a hello.c file:
$ mkdir hello
$ cd hello
$ cat << EOF > hello.c
#include <stdio.h>
int main(int argc, char ** argv) {
  printf("Hello, world!\n");
}
EOF
# compile
$ emcc hello.c -o hello.html

# run the emrun webserver included in the Emscripten SDK
$ emrun --no_browser --port 8080 .
You can now open the browser at localhost:8080
And you should see the hello world output:
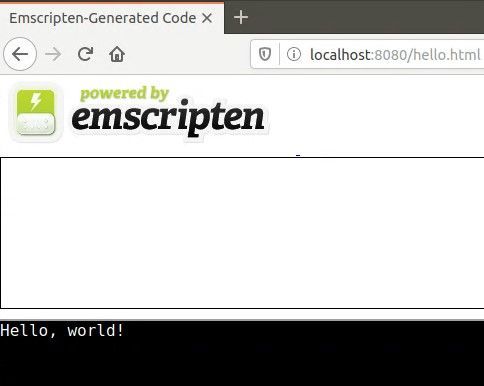
This means that you can now compile to WebAssembly.
Get OpenCv
Next, lets pull the OpenCv sources and customise the installation:
Go back to the base directory customopencv/ and download the latest openCv from Github:
$ git clone https://github.com/opencv/opencv.git
Today, this is OpenCv 4.2.0
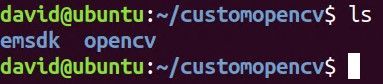
You should now have two folders:
Remove unwanted modules
As mentioned earlier, the default build includes many features such as object detection with Deep Neural Networks (DNN). In our case, we decided to use the older, somewhat less accurate HAAR cascade object detection because the DNN models are quite large (>10Mb) which is not optimal in a web application. HAAR casacade classifiers on the other hand are about 50-200Kb.
So lets remove the DNN Module:
Open the file opencv/platforms/js/build_js.py, find the function get_cmake_cmd(self): and set the DNN Module to OFF:

As you can see we also deactivated the photo module because we don't use this feature. You can reduce the build size even more if you only use the core Image processing features, simply deactivate features as needed.
Note: By default, the build will create one single artifact opencv.js with the wasm code included. If you want to build a separate .wasm file, you need to open the file opencv/modules/js/CMakeLists.txt and find the line
set(EMSCRIPTEN_LINK_FLAGS "${EMSCRIPTEN_LINK_FLAGS} -s MODULARIZE=1 -s SINGLE_FILE=1")
remove the -s SINGLE_FILE=1, so the line should read:
set(EMSCRIPTEN_LINK_FLAGS "${EMSCRIPTEN_LINK_FLAGS} -s MODULARIZE=1")
Build
Time to start the build.
We specify the --build_wasm flag so it will compile to wasm. we also provide a path to emscripten we configured earlier.
# cd into the opencv directory
$ cd opencv/

# start the build
$ python platforms/js/build_js.py build_out --emscripten_dir /home/ubuntu/davidopencv/emsdk/upstream/emscripten --build_wasm --clean_build_dir
If all is set up correctly, the build will start. It will take some time. For a "dry run", you could add the --config_only flag at the end of above command.
After a while, you should get this message:
===== Build finished =====
OpenCV.js location: /home/david/customopencv/opencv/build_out/bin/opencv.js
Go to the build_out directory to see the result:
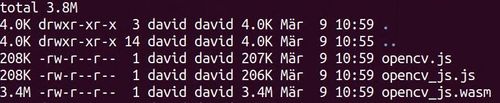
As you can see, by removing the DNN module we have cut the filesize in half.
Author

Edi Spring
Geschäftsleiter, Software Architekt und Entwickler
Passionierter Trailrunner und Bierbrauer